


Thanks for using ViralSweep! Setting up your first sweepstakes is super easy. Here in this guide, we are going to help you in each step of setting up the viral platform. Follow the steps and you’ll be ready to go in no time!
Steps To Set Up ViralSweep
1) Register at ViralSweep.com with your email address, password, and your company name.

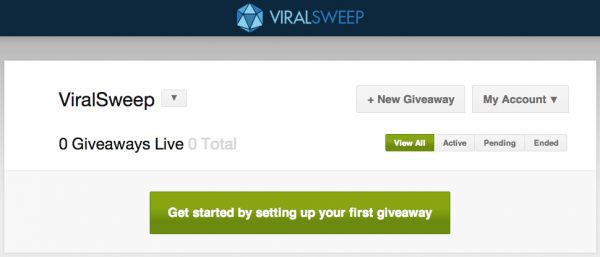
2) Once you sign up, you will be taken to the user dashboard. Click the big green button to set up your first sweepstakes.
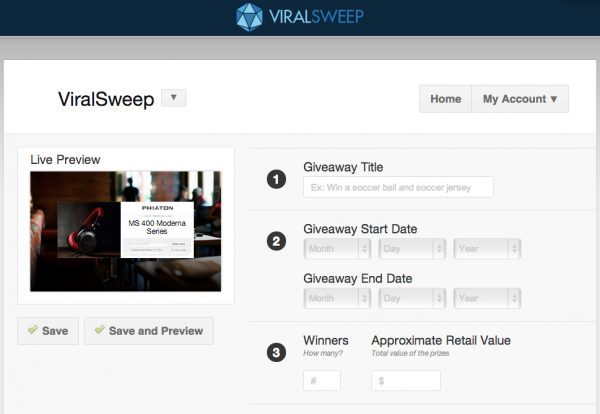
3) This is the New Giveaway page. This is where you will be able to build all of your sweepstakes just by entering the required information.
On the left-hand side is a live preview of your sweepstakes. As you input information, this live preview will update. You can click ‘save’ at any time to save the information or ‘save and preview’, which will save the information and redirect you to a full-screen preview.
4) Begin Step 1 by entering your giveaway title. Remember, this is the title that everyone will see, so use something catchy. If you were to give away an iPad, here is an example of a bad title and a good title.
BAD: 16gb new iPad
GOOD: Win a Brand New 16GB iPad
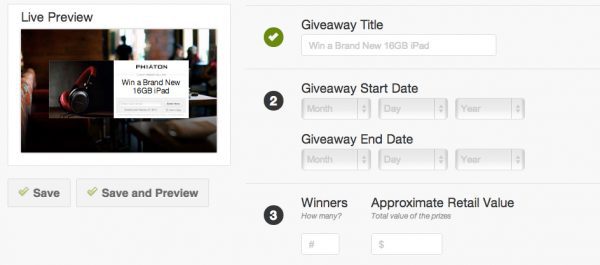
Did you catch that? As you enter your information, each field will automatically check itself off. If you did something incorrectly, the field will remain the same, and you’ll know that something needs to be fixed.
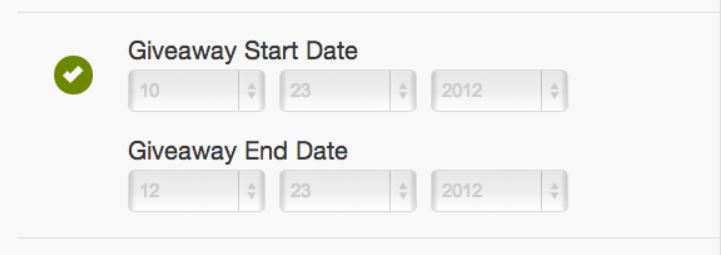
5) Next, select your giveaway start and end dates.
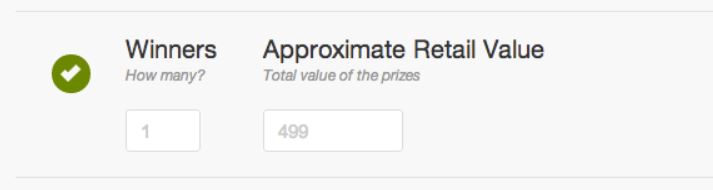
6) Next, input a number for the number of winners you want to have and the approximate retail value (ARV) of the sweepstakes.
To get the ARV, simply multiply the value of the product you are giving away by the number of winners.
7) Now, it’s time to upload your images. Accepted file formats are JPG, PNG, and GIF.
In Step 4, click ‘Choose Image’, find your company logo on your computer, and select it. Once it is uploaded, you can click the Edit & Crop button to edit it.
The logo will scale to 200px x 100px automatically.
Next up is Step 5, where you upload your product images. Once your photos are uploaded, use the ‘Edit & Crop’ button (if needed) to edit them.
They will scale to 400px x 360px automatically, but they will look better if you use the cropper tool.
Finally, upload a background image or choose one from our library. The maximum file size is 1.5mb.
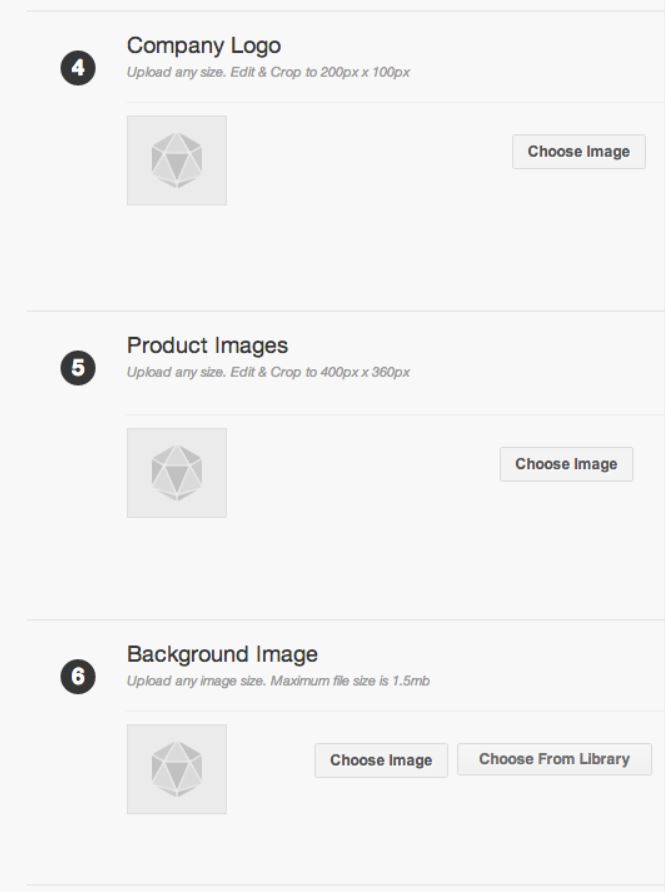
Note 1: The giveaway page background where your logo goes is white, so make sure you don’t upload a white logo or it will not show up.
Note 2: Step 4, 5, and 6 will not automatically check off until you save the page.
9) It’s time to enter your social pages. Enter the full URL for your Facebook, Twitter, and Pinterest pages. If you don’t use one of these services, leave the field blank.

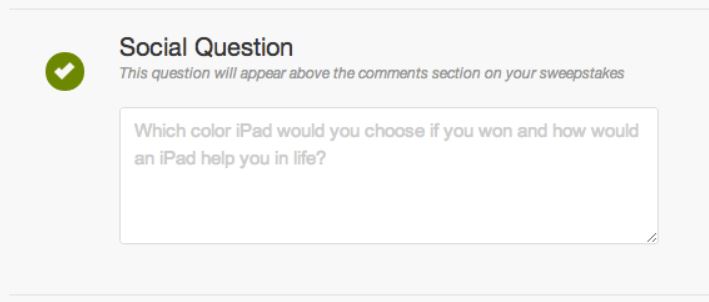
10) Now enter your Social Question. On your sweepstakes page is an embedded comment form.
Above that form is where this question will go, and people will be leaving comments in response to this question. A good question should relate to your company or products. If you were to give away an iPad, here is an example of a bad question and a good question.
BAD: What color iPad do you want?
This is a bad question because it does not encourage discussion – answers would all be the same and consist of either ‘black’ or ‘white’.
GOOD: Which color iPad would you choose if you won, and how would an iPad help you in life?
This is a good question because it encourages discussion. People get to tell you which color they want and how winning an iPad would help them in life. This opens the floor for discussion, and you can chime in and respond in the comments.
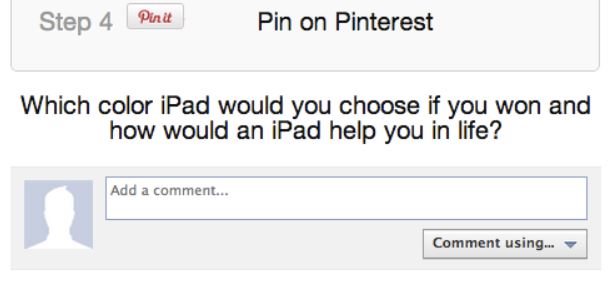
This is how your social question will appear on your giveaway page.
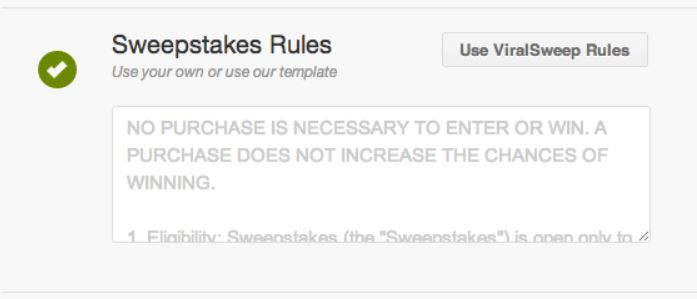
11) Sweepstakes rules are necessary in order to make sure you are complying with federal, state, and local laws.
You can copy and paste your own sweepstakes rules directly into the box, or you can use a sweepstakes rules template that we have put together for you by clicking the ‘Use ViralSweep Rules’ button.
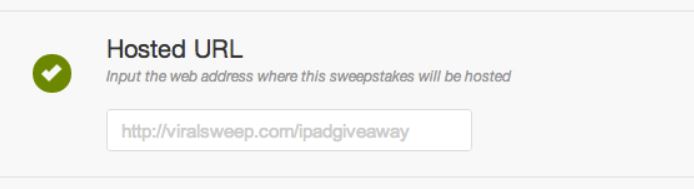
12) Enter the Hosted URL for where this sweepstakes will be hosted on your website. For example, if you wanted the sweepstakes to be hosted on a page on your website called ‘sweepstakes’, then the URL would be ‘yourwebsite.com/sweepstakes’.
If we were to run an iPad giveaway on ViralSweep, we would make our Hosted URL ‘viralsweep.com/ipadgiveaway’.
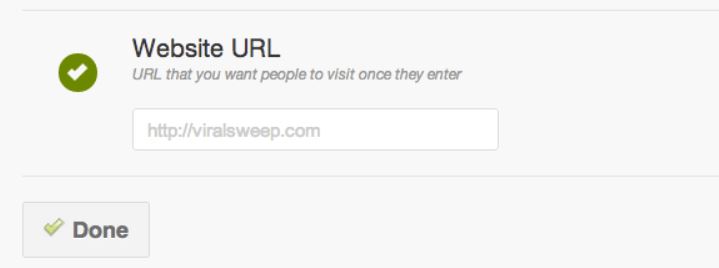
13) The last step is to enter your website URL or a page you want people to visit once they enter your sweepstakes. When finished, click ‘Done’.
14) You will now be redirected to the user dashboard. If you set up everything correctly, your giveaway will be blue.
If something is wrong, it will show up yellow, and you will need to click ‘Set up Giveaway’ and fix any step that is not correct.
Click the green ‘Start Now’ button. A menu will drop down, revealing two plans. If you’re a single business, choose the $99 plan.
If you’re an agency that manages multiple businesses and wants to use ViralSweep for multiple businesses, choose the $399 plan.

15) Enter your billing information as requested.
16) If you entered everything correctly, you’ll reach our Thank You page. Give it a few seconds, and you will be redirected to the user dashboard.
17) Now, you should see your sweepstakes in your dashboard displaying the HTML code that you will need to place on your website for the sweepstakes to appear.
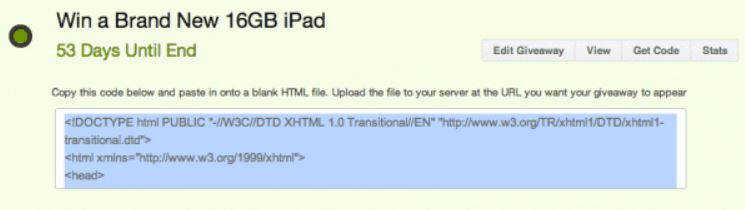
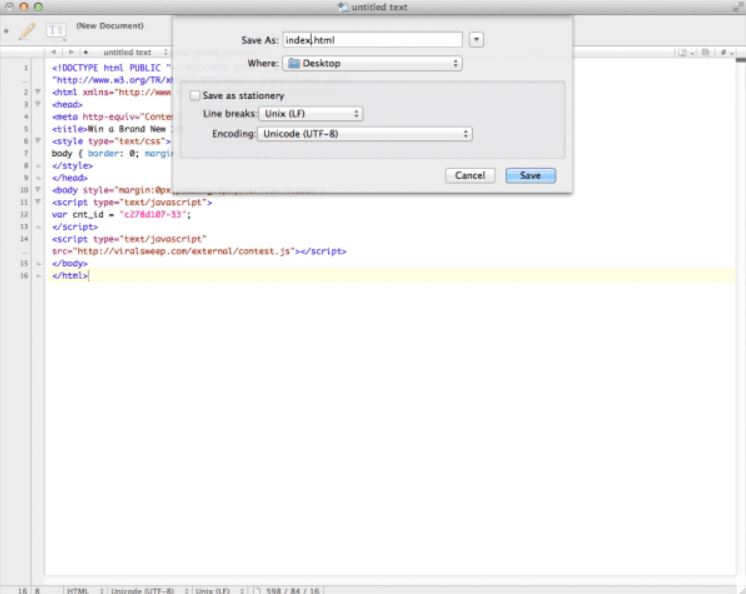
Copy that code and paste it onto a blank HTML file. Alternatively, you can email this code to your developer. Save the file with the proper extension. For this example, we’ll save our file as ‘index.html’.
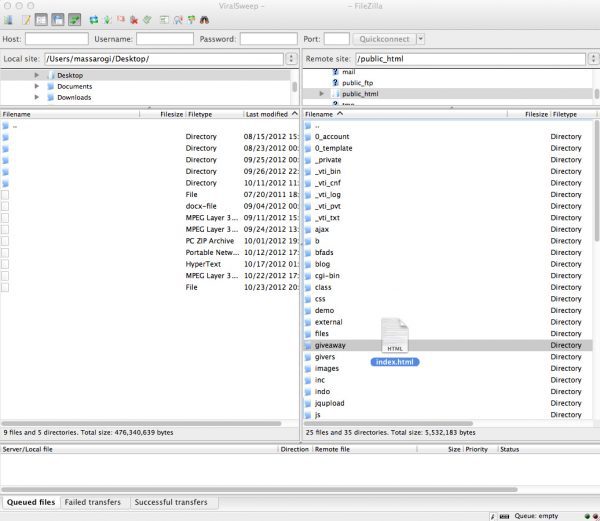
18) To upload this file to your server, you will need to use an FTP client. If you’re not sure how to do this, just send the file to your webmaster, and they will be able to upload the file for you.
For this example, we want our sweepstakes to show up at the URL ViralSweep.com/giveaway. In order to do this, we need to create a new directory on our server using our FTP client called ‘giveaway’.
Then, we simply drag and drop the ‘index.html’ file that we created into our ‘giveaway’ folder.
19) That’s it! Visit the URL where your sweepstakes should appear, and it should now be showing.

Having trouble or still need help? Email us at help [at] viralsweep [dot] com or leave a comment below, and we’ll help you out!


Top 10 Tips For Creating An Amazing Giveaway - ViralSweep
[…] can structure a giveaway as a sweepstake, where you generate the winner randomly, or as a giveaway contest, where the public votes or a […]
Where to run a giveaway? Facebook vs. Your Website
[…] Giveaways have helped Shoptiques with user acquisition, and Olga tells us they will continue launching new giveaways. […]